


10 min read
Create automated notifications
Set up automated notifications from your tables so your team always receives the updates they need.

You'll learn how to:
- Build a notification button
- Apply automation to alert teammates
- Personalize your message with dynamic row data

What you'll use in this guide:
- Buttons to send notifications
- Automations to run reminders automatically
Before you begin
Before building your automated notifications, it helps to get familiar with the two features that make everything work: buttons and automations.Buttons
Buttons let you add powerful interactions to your doc; whether you place them directly on the canvas or inside a table, they are one of the most versatile tools in Superhuman Docs. When you want a button to act on the details of a specific row, a button column is the right choice.Automations
Automations help Superhuman Docs manage your repetitive tasks so you don't have to. They take routine work off your plate, like sending reminders, handing off tasks, or nudging teammates at the right moment. You can always explore more about buttons and automations, but the steps below will walk you through exactly what you need.1. Start with a table of your key information
Every notification workflow begins with a well-structured table. The table should reflect the work your team tracks day-to-day, that could be deadlines, reviews, upcoming commitments, or items that need someone's attention. It becomes the one source of truth your button and automation rely on to know who to notify and when to send a reminder. Tables can power a wide range of workflows, but notification automations shine when the table has a few reliable signals your doc can interpret. In a task-style table, a helpful column structure includes:- Task or item name
- Due date or timing field
- People column for the owner
- Status or stage indicator

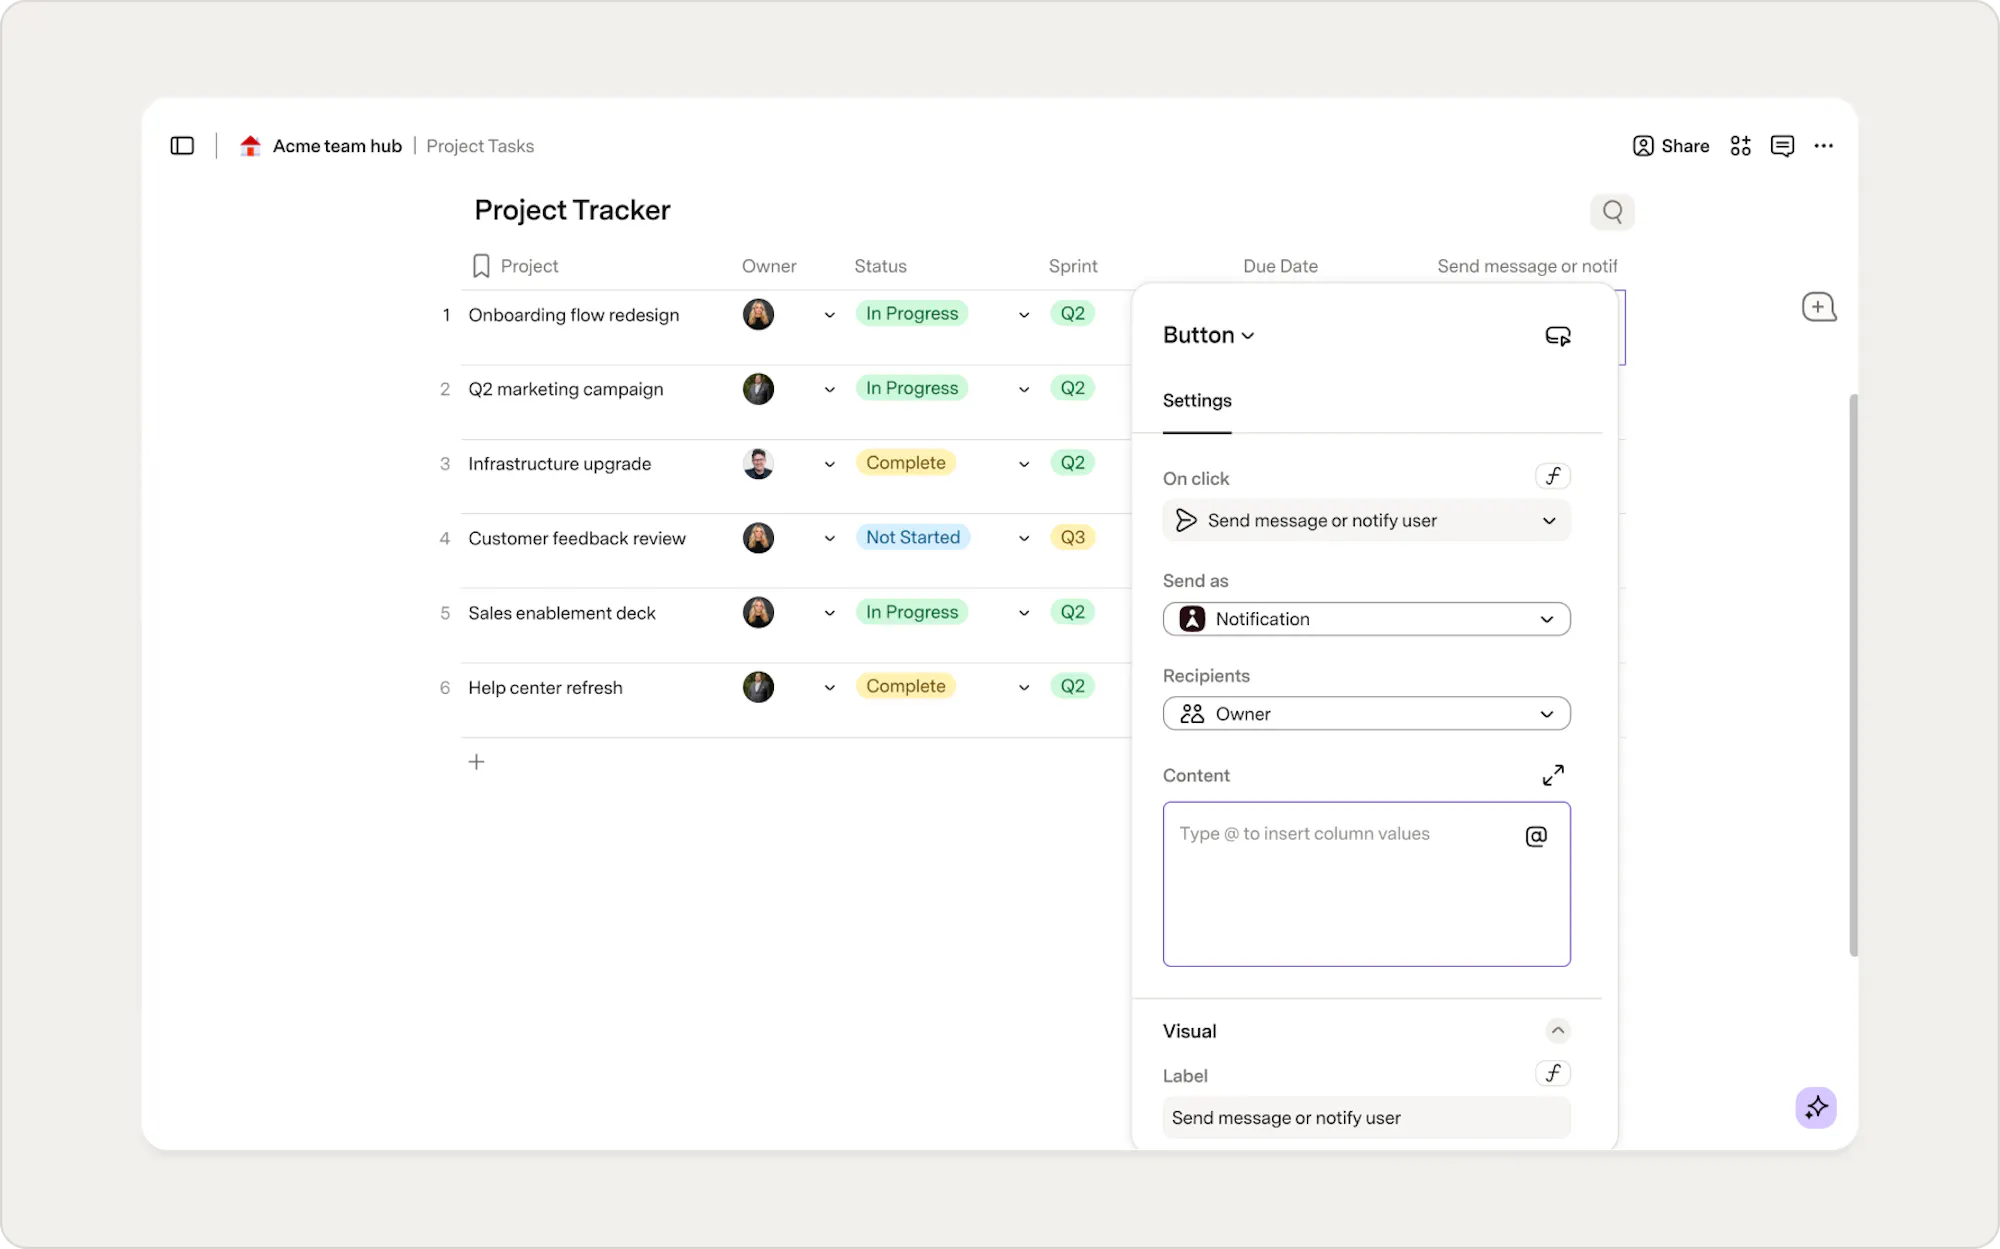
2. Create your notification button
Your button is where everything comes to life. It's the piece that actually sends the notification, and since the button is right in your table, it knows exactly what's happening in its row. Who's the owner? What's the task? What needs a nudge? After a quick setup, your button's on it. When you add a button column, you're specifying the action the button performs. Superhuman Docs offers many button actions, like updating rows, opening links, and running connectors. The button you'll use is the action designed for communication: Send message or notify user. This action lets your button deliver the targeted notification to the person who needs to see it.Add the button
- Select the plus icon (+) in the top right corner of the table to add a new column.
- Set the column to Button.
- Under On click, choose Send message or notify user.
- In Send As, select Superhuman Docs Notification. Superhuman Docs will alert the recipient of new notifications via their connected email address and the Notification button in the top-left panel.
- Now, select the Recipient. You can:
- Reference the People column so the notification goes to the person assigned to the row.
- Select a specific user if the reminder always goes to the same teammate or team alias.

Want to receive notifications in Slack?
Install the Superhuman Docs Bot for Slack. The Superhuman Docs Bot delivers notifications directly to Slack.
3. Personalize the notification
A clear, personalized message gives the recipient the context they need to act quickly, and the Content field is where you shape that experience.How to personalize your message
Start by typing directly into the Content field. When you want to pull in details from the row, like the task name, owner, or due date, type "@" and choose the column you would like to reference. Superhuman Docs will automatically fill in the right information for each row. Your message might look like: "Hi @People, this item needs your attention: @Task, and it is due on @DueDate." It's simple and delightful.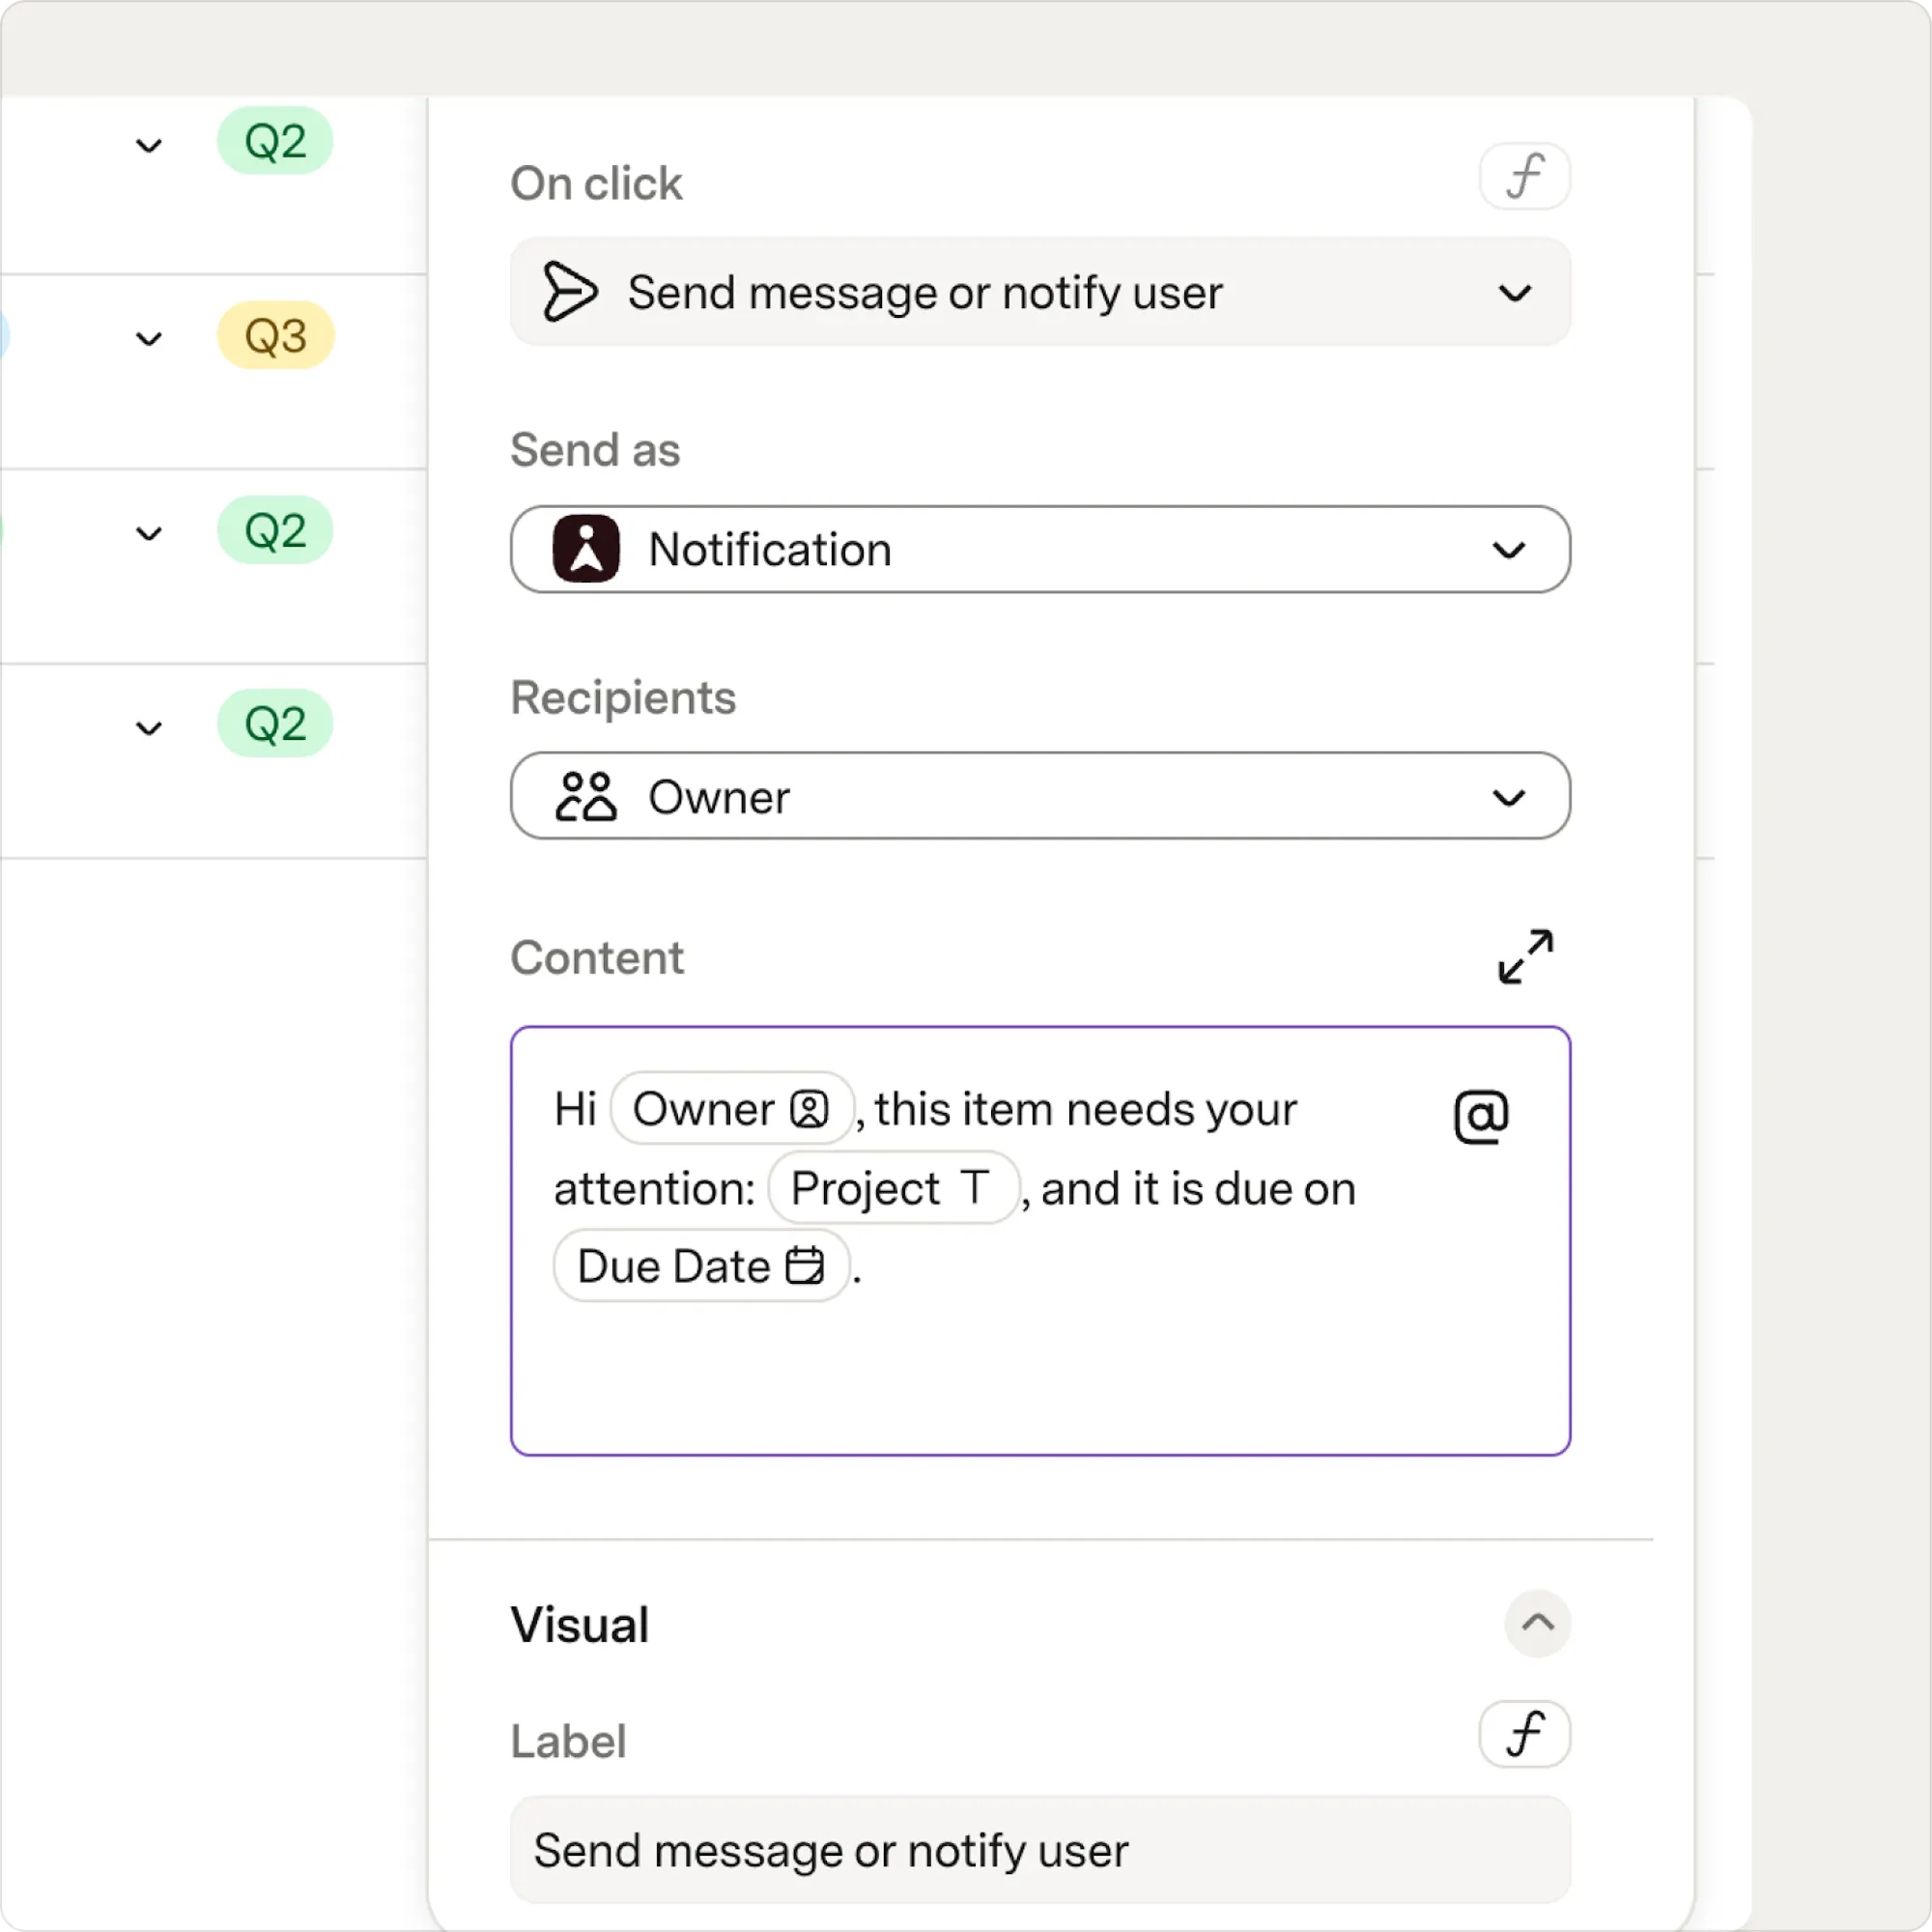

Why the @ symbol matters
The @ symbol tells Superhuman Docs to grab the values from that column in the current row and place them in your message. It's a tiny shortcut that makes each notification feel like it was written just for that person, even though the same button powers every row.
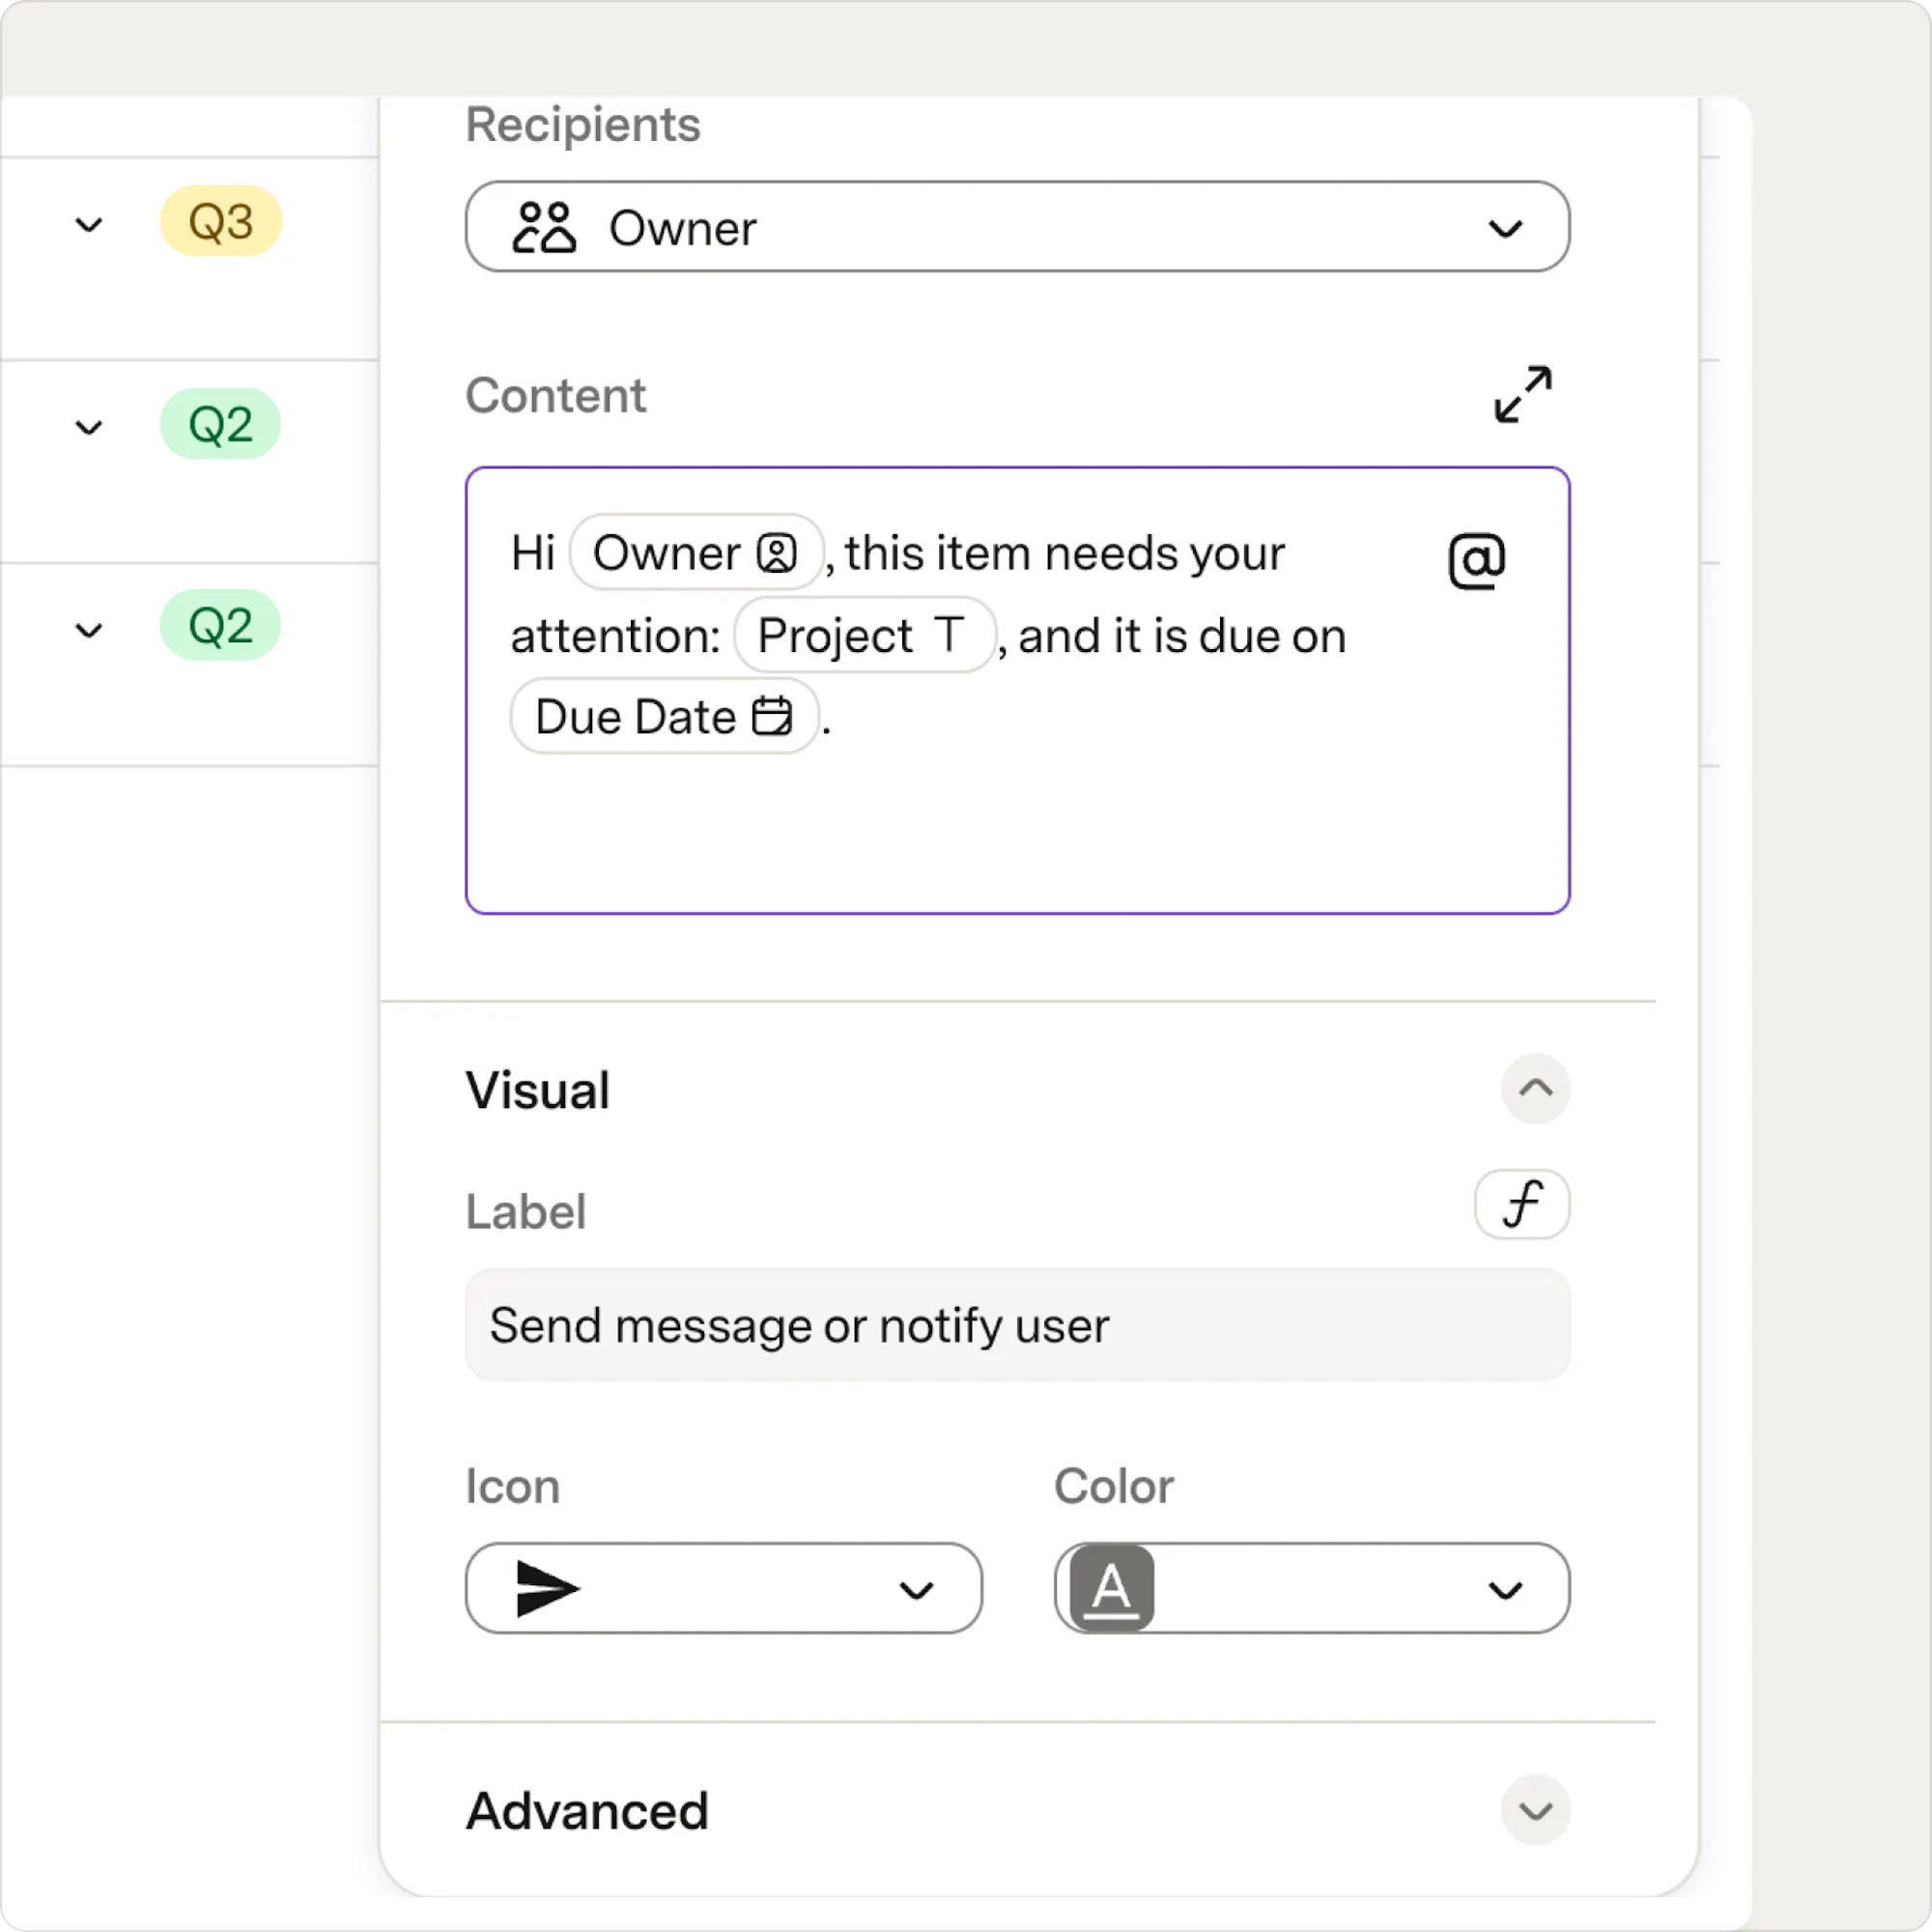
4. Give your button a look and feel
Customizing your button's appearance isn't required, but it can make your table more fun for anyone using it. In the button settings, open the Visual section to adjust how your button appears.- Label — Use a short, clear verb so the action is clear
- Icon — Choose an icon that matches the intent of the action
- Color — Helpful if you want the button to stand out or follow a pattern in your doc
5. Set when your button is active
The Disable if setting makes your button a little bit smarter and a lot more considerate. Without it, your automation will happily press every active button each time it runs. And while the enthusiasm is great, sending duplicate or accidental reminders to your teammates is... less great.How Disable if works
Disable if uses conditions based on the column values in your table to determine when a reminder will be helpful. You might disable the button when:- The work in that row is already complete.
- The due date is still in the future.
- Required fields are blank.
- The project has moved to a stage where a reminder is no longer needed.
Add Disable if in the button settings
- Right-click the button to open Button Settings.
- Scroll to Advanced and find the Disable if option.
- Select the option to Add condition.
- Enter a condition to disable the button. For this workflow, use the Due Date column.
- Use the dropdown menu to select is not equal to today.
- If the condition is true, the button is inactive (greyed out).
- If the condition is false, the button remains available.

Build more advanced conditions
For more advanced conditions, open the formula builder. With Superhuman Docs' formula language, you can reference more fields or add custom logic. It can be helpful if you want to add extra guardrails.
6. Automate your notification button
Automations let your doc run actions on a schedule or in response to changes, so reminders go out consistently without requiring you or your team to check your table every day. Using a button as the action point gives you a single, central place to update notifications if processes or roles change. Now, you’ll create a time-based automation that presses your notification button at a set time. Superhuman Docs offers several automation triggers, and understanding them helps you see what’s possible as your docs grow.Set up the automation
- Select the Insert button in the top right to spice it up.
- Type “Automations” in the Search bar.
- Find Automations under the Doc settings section.
- Select Automations.
- Choose + Add rule.
- Give your rule a clear name and brief description.
- Under When, choose Time-based and set the time that fits your schedule.
- Under Then, choose Push buttons.
- Choose your table and your notification button.
- At the top of the Automation panel, Toggle the rule to On.

What happens when the automation runs
Once your automation is active, Superhuman Docs will:
- Look at the table you specified.
- Check each row to see whether the button is enabled.
- Press the button for each row where the button is active.
- Skip any rows where the button is disabled.
7. Test your automation
Before considering your workflow complete, test your automation. This is where your workflow gets to show off a bit. And a quick heads-up while you're here: when running a test, Superhuman Docs doesn't play favorites. It will press every button that's currently active in your table, not just the one you focus on. If you only want to test a single row, you can temporarily disable the others to avoid sending more reminders than planned.How to test your setup
- Add a temporary row that would trigger a notification.
- Assign yourself as the owner and add any key details, like due date or status.
- Confirm the button in the row is active (not greyed out).
- In Automations, select Test rule.
- Take a peek at the notification to confirm it shows up with the right message and details.
Now what?
You’ve built a scalable notification workflow that saves time, keeps teammates aligned, and removes daily follow-up from your plate. Explore how to notify teammates in Slack or MS Teams MessagesWas this helpful?
YesNo