


How to build with the advanced features in Coda
Part three of our series on how Coda’s powerful formulas make game-changing connections across docs, tables, and more.


Rocky Moon
Product Education Specialist at Coda
How to build with the advanced features in Coda
By Rocky Moon
Share this article


· 9 min read
1. Stronger tables hold more data.
Have you ever noticed the similarities between trails and spreadsheets? No, that’s not the setup for a bad joke; stay with me. Whether you’re taking a stroll through your neighborhood park or climbing switchbacks in the Rockies, you’re really just walking. That same basic activity can carry you through many, many different levels of complexity or difficulty. Coda tables can have a similar range. (We talked up our tables in the very first edition of this series, so jump back over there if you need a refresher.) Sure, they’re as simple to use as that walk in the park. Our tables are great for something as simple as making a packing list for your next trip. But those same tables can do some breathtaking things with data once you know your way around. And yes, even though it is technically just walking, it takes some training to comfortably summit a fourteener. Building more complicated tables in Coda takes some skill leveling, but I promise it’s much less difficult than hiking a mountain. A great place to start upgrading your tables is by using all of the available views and versions. You can add different views of the same Coda table to as many pages as you need without having to copy/paste or reenter anything anywhere. That means you can use the exact same table for projections, reports, task tracking, or pretty much anything else. Here’s one way that could go.
- Imagine you have your team’s tasks stored in a table. You’ve recorded the tasks that need to be done, the people assigned to do them, task status, and final due date. Great!
- First, type forward slash + table (aka /table) into any doc. You’ll see prompts to start a blank table, import data, or connect to an existing table. Selecting your task tracker from the list of existing tables will generate a new window into that same data.
- This new connected table will default to the view you’re using with your original task tracker. But what if you wanted to see that same information in... any other way? You’ve got options.
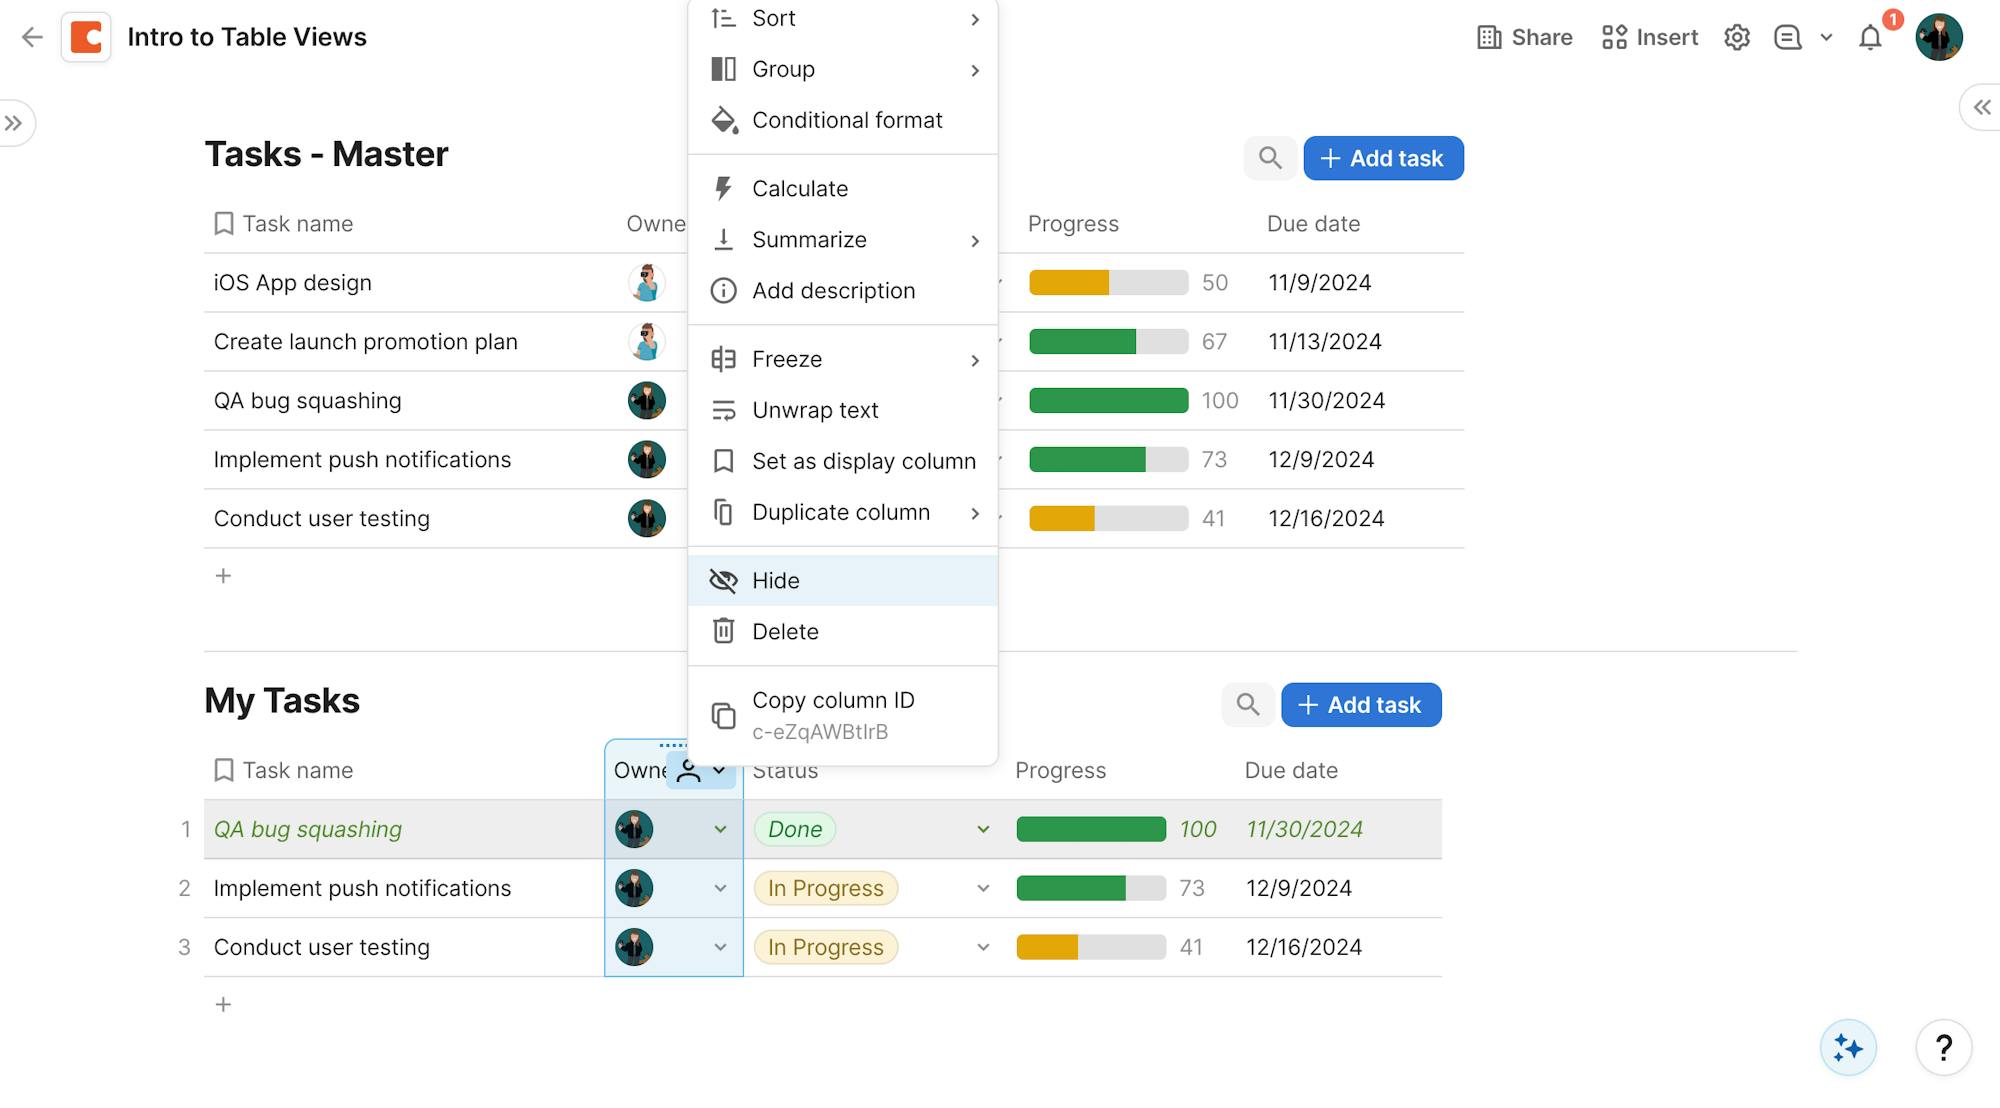
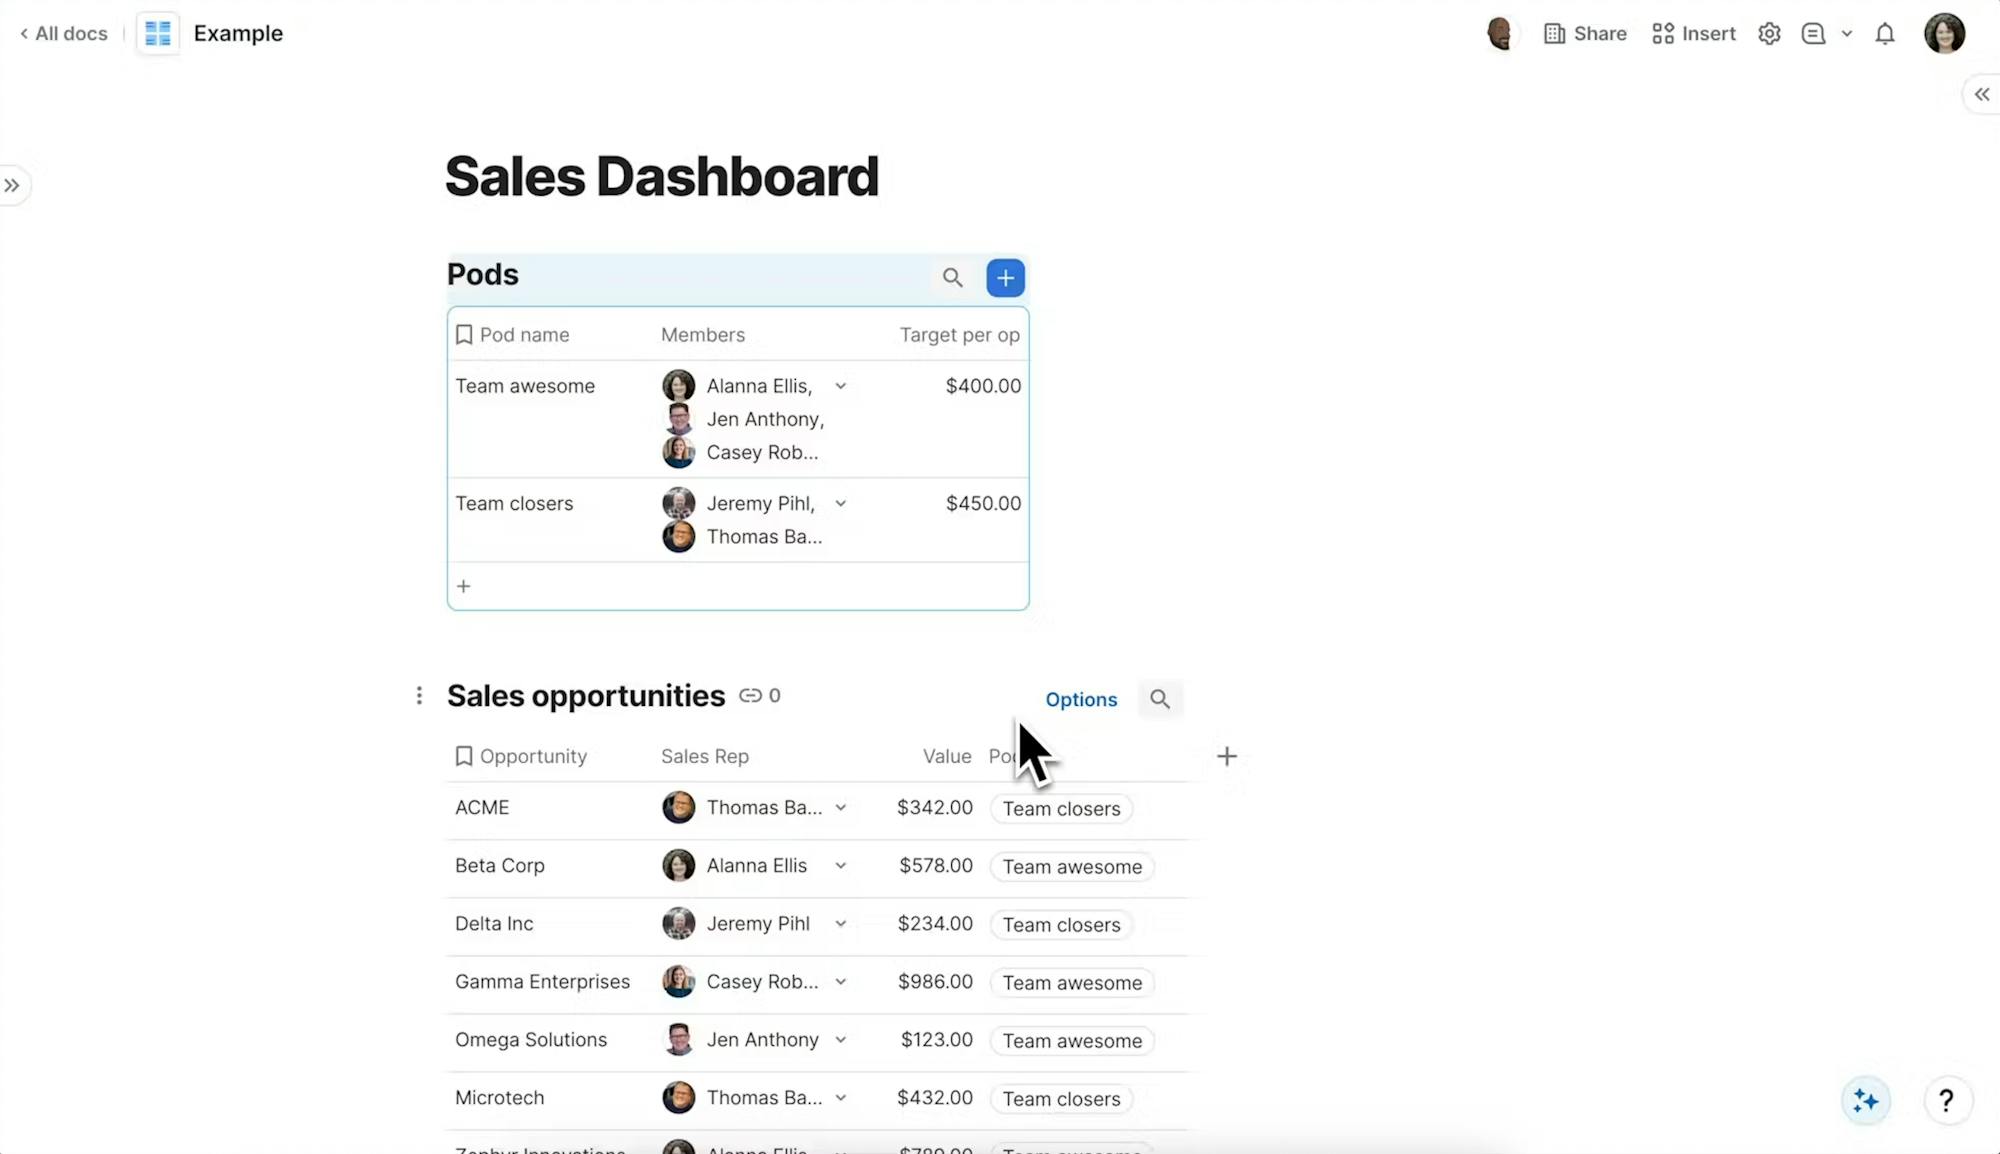
- To see them, you can hit the (conveniently named) “Options” button that pops up in the top right when you’re interacting with a table. This will pull up the nine different view types you can use with any Coda table.
- That basic task table could immediately become a due date calendar, a timeline of projects, a kanban board, or even a form that other teams can use to submit project requests to your task list.
- The best part is that your data is still synced. So any requests submitted to the form version of your task tracker will pop up on your main task tracker, ready for you to assign to a teammate. Tasks will be automatically added to the due date calendar, without you having to hit a single button. If your teammates want to use a kanban board on their personal dashboards, the main task tracker will get status updates every time they move a card from “to do” to “in progress.”

Did you know?
By now, you know that our tables and docs are endlessly versatile. But did you know that we created multiple ways to sync your tables across docs? See which one works best for you.
2. Layer up (your automations)!
We talked about automations in the last edition of this blog series, and I’m so sorry to report that I held something back. Hopefully, you’ve tried a few automations using the if and when commands in the sidebar. Powerful, aren’t they? But you can use them to do even more than your standard if/then format. We’re going to stay with that task tracker from the table point above. On this task tracker, your team uses a drop-down menu with three options, “not started,” “in progress,” or “done,” to mark project status. You, the team lead, want to know when a project is marked done, so that you can review it. Sure, you can absolutely just look at the table! But, that’s actually adding a task to your calendar—remember to check the table. Instead, you can set an automation that lets you know when a task is done. Receiving a ping whenever a status changes can lead to an overwhelming number of irrelevant notifications. You can make this rule conditional to enhance its effectiveness.- Start your automation like normal. As a reminder, you want to go to the settings cog in the top right of your doc and click on the automations tab.
- Add a rule that when a drop-down menu is changed, Coda can then send a notification, Slack, or email update to whoever needs to review the project. That’s your basic automation covered.
- Last time, we ignored the space to add a condition between your when and then. This time, we’ll go ahead and hit that. You’ll be prompted to fill in an if now.
- So now, you can have the table notify you only if a task status is changed to “done.” Just reference Step 1 Result.Status.Contains(done). This way, you’re not getting a ping every time someone on your team starts or hands over a task. You’re only getting the updates you need.
- And you can even compound the results of your automations. Say you want both an update and an organizational automation. Your same “when” a task status is changed, “if” the task is marked done, can “then” trigger that email or Slack. But it doesn’t have to end there! You can add another “and then” to reorganize the tasks.

- Make a button on the row that sends the notification.
- Update the option to disable the button unless the Status of the row is marked "done."
- Make a row change automation (like we talked about above), but skip the If section.
- Make the When section into a Push button and select Step 1 Result.Send Message or Notify User. (Note: "Step 1 Result" will be a row.)
Did you know?
Unsure if your automations are working the way they’re supposed to? You have access to a record of every single execution of every automation on your docs through the automation audit. Any issues or oddities will show up with a red exclamation mark.
3. Learn the formula lingo.
Every new hobby comes with its own jargon. “Hiking trash” might sound offensive, until you learn it’s what the long-distance hikers (”thru-hikers”) in the U.S. love to call themselves, when they’re not referring to each other by newly-coined “trail names.” See what I mean? That’s three bits of community-specific jargon, without even touching on the technical elements of hikers’ preferred gear, approaches, or environments. The deeper you get into any community, the more familiar and natural this language becomes. Coda is, of course, no different. You’ve already learned our preferred terms for tables and docs, but now I want to introduce you to our custom formula language.

- To get moving with this formula, you need to identify three main parts. Which table do you want to filter? What data do you want to see? And what do you want to do with that data?
- You can start typing your formula into any part of your doc, just hit the equals button on your keyboard.
- That will pull up a formula window that includes a handy list of possible source tables. Go ahead and select the table you want to filter from this list.
- We’re going to keep using that same task tracker just for consistency’s sake. This time, we’re building out a new view of the table that only shows tasks that are ready for review.
- Now add a period to the formula to show you’re done with that part of it.
- Start typing in “filter,” and the formulas tab will fill that out for you.
- Inside the parentheses generated after filter, you’ll name the specific row or column you care about in the table. In this case, you’ll want the “status” column. Select that status and add another equals inside the parentheses to ensure the filter only pulls rows where the status is “done” or “ready for review.”
- From there, you can add another period select from several functions. Just want to know how many things you need to review? Hit “count,” and you’ll have a regularly updated number showing you how many projects you have done.

Did you know?
We don’t expect you to figure out all the formulas on your own! Take a video course or two for inspiration on how to implement specific formulas.
Ready to hit the trails?
At this point, you should have everything you need to build exactly the experience you need. In hiking, more knowledge and experience let you get further faster, with less effort. Experienced backcountry hikers spend less time fiddling with gear. Their dedication and experience mean they get to regularly see pristine vistas and rugged wilds most of us only see in photographs. I hope you’re feeling similarly about Coda. Understanding this tool better will help you get more done in less time, building exactly the workflow you need to eliminate admin and focus on the important things. The best way to get into Coda is to simply start. (You've got this!)- Click here to start a blank doc from your workspace homepage.
- Note: In some workspaces, this requires admin permission. If this is the case for you, you’ll find instructions in-product letting you know how to request access.